I made these signs several years ago and have updated them as necessary. I usually laminate them and hang them in the bathroom. – Did you know that a laminated sheet of paper will stick by itself to the shower wall with just a tiny bit of water? Even after the shower is dry it will stay up. Just wipe it down when you wipe down the shower stall, stick it back up, and it will hang forever!
Friday, February 21, 2014


Tuesday, January 14, 2014
The 12 MONTHS of Christmas!
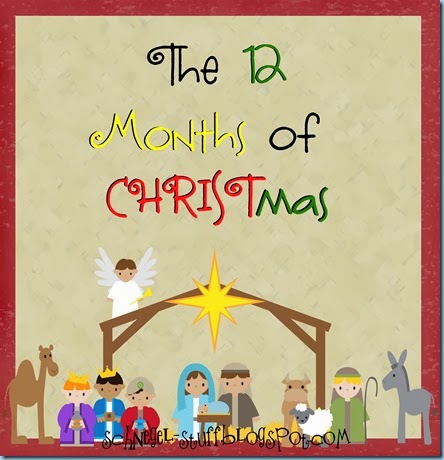
I remember the moment vividly. It was January 1st and I’d just gotten home from dropping off the last homemade Christmas gift that was obviously late in delivery. I’d walked into the living room with full intent on putting away the tree and found my husband had already done so. With a shout of pure joy I shouted YAY! Christmas is officially DONE!! It had been a long and rough month. December is packed full of 10,000 wonderful and inspiring things to do. We have 3 family birthdays the first week and that first weekend also has the town parade (we used to try to be in or see), lighting of the town tree & visiting Santa, the Community Christmas Celebration (our Stake Nativity display of which I’ve been the Ward rep for several years), the making of the chocolate Nativity for said Celebration, Ward activities, getting in the true Spirit of Christmas, starting my shopping I’ve put off until now, getting gifts prepared for 2 (possibly more) different family parties, decorating our home, school celebrations, service, and a billion other things I just love but don’t have enough of ME to do. This year someone I care about had a situation that had nothing to do with the season but that needed my support and would end up taking weeks to calm down. My lack of Christmas Spirit was weighing on me and I tried to FORCE Christmas into the small moments I had left despite exhaustion and frustration. Truth be told. Our Christmas stunk. My kids were none the wiser but I was DONE. And then in that moment of shouting for Joy I was filled with HORROR. How could I be thankful for the best time of the year and a time to focus on Christ being OVER. Never again would I be thankful for Christmas being over and I was going to start earlier this year. How early? How about NOW. January 1st. So here, for whatever you want to use it for, I present the 12 MONTHS of Christmas!
(I’d love to say that this is all planned out and ready for you here to print off and just present at your next Family Home Evening but it’s not. I actually feel it’s too personal to just say it should be done one way and maybe what your family needs and is prompted to do is going to be far different from my family’s experiences. So, I’m presenting to you a concept and my own thoughts and notes and, if you’d like to join us in our Year Long Celebration, letting YOU run with it! Also, my ideas are very obviously full of themes that go with my faith but I pray that those of all faiths will find joy in celebrating all year with us even if their individual interpretations and activities vary from mine. Again, this is an individual activity!)
Concept: Each month focus on one part of the Nativity Scene slowly building a full Nativity that, of course, ends in Christ at Christmas! You could display a Nativity piece each month or print off digital ones like the kinds you can find here on Etsy. Online I was able to find a few similar ideas (focusing on parts of the nativity scene) that are put into the 12 days of Christmas. You can check them out here and here. I looked at the Nativity Song the kids recently sang in Primary and kind of went in that direction. You could always shuffle these around to match up with holidays from those months. We’ve been focusing on the STAR this month and if you ask me I can tell you about the amazing things that have come from it. :)
Here are the 12 we’re doing (and a fun order suggested by my amazing SIL that almost follows the story as laid out in the Scriptures!) and my thoughts on different things we can talk about each month. PLEASE share your ideas and let me know if you chose to use other items!
- star - The Spirit (following promptings), family history (searching for someone), being an example (Light within, Light of Christ, Letting our light shine that men may see our good works and glorify our Father in Heaven) Prophets/prophecy (the sign of the star was foretold) -New Year/New Star (January)
- angel - Missionary work (proclaiming the Gospel), Joy (rejoicing), Song (music, talents) Restoration (Angel Moroni) – My SIL suggested a fun play on Cupid here and the more serious thought of the Angels bringing Joy and Love (February)
- Shepherds - Christ (the great Shepherd), Missionary work (leading them home) Visiting Teaching/Home Teaching (helping and teaching others) Being watchful (safety, recognizing evil when we see it, listening to the messages we’re given, RUNNING to truth and rejoicing in it) Being Humble – (March)
- Sheep - Christ (Lamb of God) Sacrifice (giving of ourselves, callings) Ordinances (taking the sacrament) - would this be a good one for EASTER (April)
- Mary - Motherhood (helping Mothers or pregnant women) Birth (personal history, Rebirth/born again) Relief Society (women in the church, service) Marriage/family (loving your spouse, giving to our children, togetherness, love) - Mother's Day (May)
- Joseph - Fathers (hard work, step fathers - loving those who are in our lives but not of our DNA, Heavenly Father, Christ, the bishop) Service (for our Dad's, for others) Family History work (Turning our hearts to our Fathers) Patriotism (our Fore Fathers) Marriage (focusing on our spouse, putting them above ourselves) Work (working hard for a living, being honest in our taxes) Callings (doing what we’re asked when it’s hard) - Father's Day (June)
- stable - helping the less fortunate (homeless), FHE (Spirit in our Home, Love at Home - Valentines (Feb)?), Gospel principals (Building a firm foundation) Temple (temple worship, House of the Lord) Organization/Cleanliness – Freedom/Home (July)
- Manger/Hay - Preparedness/food (emergency preparedness, food storage, warmth of the Spirit, Word of Wisdom), Scriptures (feast up on the Word) – you could add Swaddling Clothes here and/or do it later. It kind of goes with the theme. – (August)
- Cattle/Oxen (camel/donkey) - Work (service, around our home, appreciating the value of work) Animals (creation, service at animal shelter, caring for them, appreciating them) Companionship (friendship, warmth, giving) – (September)
- 3 Wise men - Education (learn something new, what is Wisdom?) Travel (going the extra mile, learning about other people in other places or how we are different yet the same) Holy Spirit (following the Spirit, recognizing promptings) Personal study (spiritual preparedness, they were versed in the scriptures and knew the signs to look for and followed them) Heeding warnings (patriarchal blessings, following the Spirit, trusting church leaders) Faith (Faith in Action) – (October)
- Gold/Frankincense/Myrrh - Gifts (Gift of the Holy Ghost, Gifts of the Spirit, Golden Plates, give of ourselves, thank yous for the gifts we've been given spiritually and physically from others, work on Christmas presents, evaluate the kinds of gifts we give) Finances (tithing, budgeting) – focusing on Gifts/gratitude for Thanksgiving (November)
- Christ - no description needed (December)
So, these are literally my quick notes I jotted down as they came to me and there’s probably some obvious ones I’ve missed or some big meanings that will strike me later (or that you’ll share with me PRETTY PLEASE). Again, I think this is a personal activity and my ideas may be far from the way you do it. You may want to study the historical sides of these items or find scriptures that go with each and stories. So far we’ve been going on promptings and ideas that come to us in the moment and then trying to recognize the things that are relevant as they cross out path. (We had 2 songs in Sacrament meeting this week that had to do with Light and even the Star and have had multiple experiences this month that tied directly to LIGHT and the idea of the Star so amazingly well that I know it was inspired. No lie, at one moment when I was recognizing such a connection Twinkle Twinkle Little Star started playing on the TV (it was sung by monkeys but it was well timed none the less!). Maybe you’ll do Family Home Evenings about it or maybe you’ll just contemplate it’s meaning yourself but my hope is that our family (and yours) will be much better off this coming Christmas season because we’ve done all that we were meant to do all throughout the year and instead of trying to force it all into one month we will already have the Spirit of CHRISTmas with us as we start off and all will be well.
After all, He’s not just the reason for “the Season”! and I can now say YAY! Christmas is NEVER over!!
Wednesday, January 1, 2014
Wooden Canvas Silhouettes

The best part of this project for me? I didn’t find it on Pinterest! I Made It Up! lol That may sound silly but in a world of information at our fingertips I get a real sense of satisfaction at coming up with my own ideas!
Here’s what I started with… $5 wooden canvases from Wal-Mart. I actually paid under $5 for mine.

I also bought some of these for a backing. The small pine boards were on clearance for $1.29.
I previously took silhouette pictures of the kids outside by the garage door for good contrast. (I’ve blurred him post picture just for privacy. Your silhouette picture should be as sharp as possible for the best definition.) I also cropped the original photo to cut down on the area I needed to edit.

Then to Photoshop… (you could use most any editing program. I often use a free one called Paint.net)
Load photo into Photoshop and pick Quick Selection Tool

If your contrast is good then your wand should easily (very easily) select the outline of the silhouette. You can fine tune the line if needed. Mine did pretty good in one try.
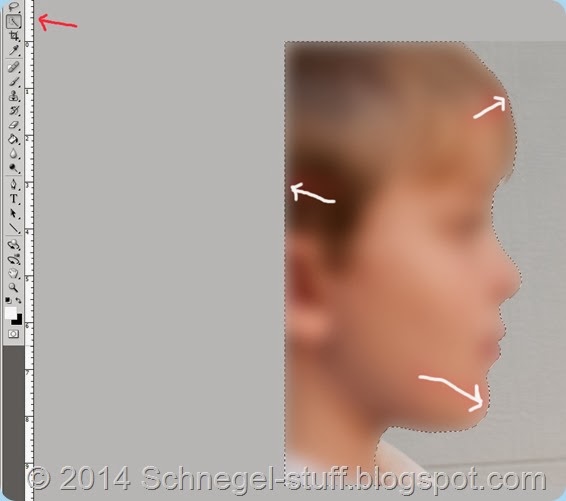
Select the paint brush in a very large size (to save time) and choose black paint. Then paint over the silhouette. It will only cover the parts highlighted.

Once the black is filled in, choose to Select Inverse to highlight the background of the photo.

Then repeat the previous step with white as your paint color.

Save your finished photo. I then loaded it into Word, reversed it (I’m going to use the stencil on the back of the canvas), selected how tall I wanted it to be (about 8.5 inches since it’s a 10inch canvas with 3/4 in border). I then printed it out!


I trimmed my stencil and taped it onto the back of the wooden canvas. I set the neck line just under 4 inches from the front of the frame to ensure the wooden pine board I selected as a background would completely cover the hole. I traced it with a pencil and then traced over the indention left in the wood so I could see it better.

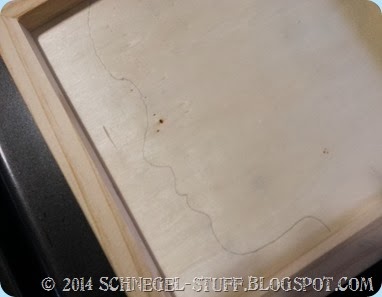
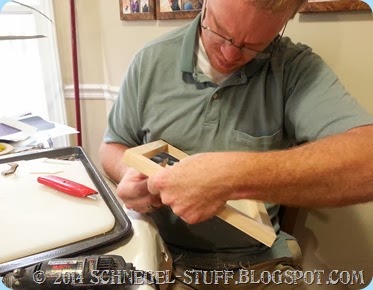
This is where it gets complicated and scary. In my mind we had the right tool to just cut this out. But we didn’t. So, before I found what we finally used I easily cut the silhouette down to this with a box cutter. Be careful, the wood splinters very easily. Next my hubby and I used a dremel tool and the box cutter to grind the wood as close to the line as possible and kind of whittle in the details. Good sandpaper took care of the rest.
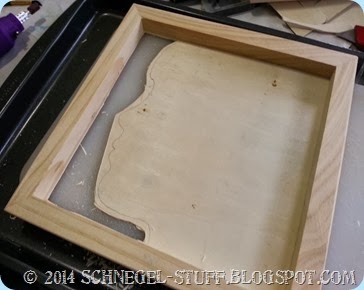
I then gave the final a base coat of white acrylic. A light sanding would definitely help (either before or after the painting). If/when I make my own set (these were a gift) we may either gloss coat them in black or maybe even stain the two wooden surfaces with different wood stains. You could modge podge them, write on them, possibilities are endless.
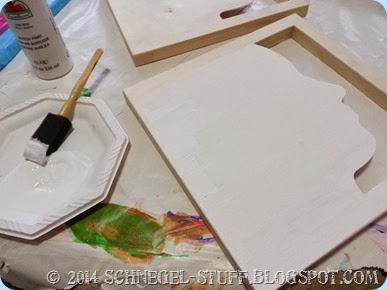

I set the pine board behind it and it will eventually be painted black for this project but there are many options here. You could cover it in fabric, modge podge on some writing or photos, or leave it out entirely. The wall color would show from behind and a light could even be placed inside to accentuate the silhouette.


With my hubbies help (and amazing woodworking skills in the face of bad tools) we were able to make 4 of these in only a few hours.

Friday, March 15, 2013
How to find a Four Leaf Clover

So it’s that time of year again and my kids are super excited because they get to bring their Four Leaf Clovers to school and have everyone stare in amazement! It never fails that year after year everyone is so amazed at the amount of lucky clovers we seem to have on hand. I used to tell folks I just had an eye for it but the truth is…my dad taught me some great tricks when I was a kid and now finding them is easy!

Most everyone I know says they’ve looked and looked for a four leaf clover and never found one. I can sympathize with that feeling since I’ve looked and looked for missing shoes in my children’s rooms and, alas, they elude me. However, with just a few simple tricks you may find yourself picking up some luck left and right!
How to Find a Four Leaf Clover:
1. Bright sunny days are best because not only can you see better but the clover are usually opened up wide and facing the sun. If you stand with the sun to your back you may find that all the clover are facing you. Depends on the day and how much rain there’s been lately.
2. Get down low and brush your hand across the clover to break them up a bit. There’s nothing more frustrating than the excitement of your first find only to discover it’s two 3-leafers stuck together. Sigh.
3. Look for a SQUARE in a sea of TRIANGLES!! This, by far, is the most important rule and the secret trick that really helps you find that first one. The 3 leaves of the standard clover form a triangle where as the four leaves of our elusive luck bringer form a square. Don’t spend your time looking at each and every clover you find. Just glance around any given patch and look for that fantastic square! If you don’t find any within a moment or two, move on. Many patches don’t have any so don’t waste your time.
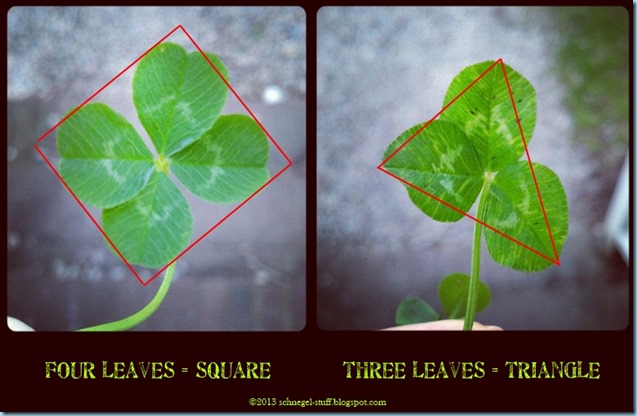
4. If you find one STAY RIGHT WHERE YOU ARE because where there’s one there’s more! What ever the mutation is that causes four leaf clovers to form, it tends to grow in clusters. It never fails that after I find one if I just spend a few minutes looking around I start finding more and more and more!
5. Found a lucky patch? Well, it’s bound to stay lucky! So don’t forget where it is, but many patches rotate on their luckiness and what was a dry patch one year may be the best in the land the next.
6. DON’T GIVE UP!! This is the most important of all!! I find hundreds (yes, hundreds) of clovers each year but there are days, even weeks that I find NONE! Some patches, yards, fields just don’t have any. It will all be worth it the day you find that magic patch of luckiness and load up!!

Now, once you’ve collected your quabillion four leaf clovers make sure you keep them in shallow water until you’re ready to dry them. But don’t wait too long or they’ll rot. Clovers dry well between phone book pages or on paper towels between book pages but just know that they’ll take on the texture of what ever your mash them between so paper is best.

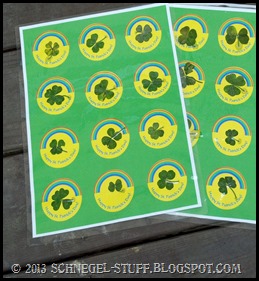
We laminate most of our clovers every year to share with our friends and neighbors on St. Patrick’s Day! I also keep a few in my wallet to share with anyone I find who just feels they are down on their luck. Brings a smile every time!


GOOD LUCK!!

Friday, August 17, 2012
Taekwondo Belt display
My awesome nephew is awesome at Taekwondo and his mom wanted to show that off! She took some of the boards he’d broken and used them as a box to hold all of his belts! The then hung it on the wall of his room! What a great way to display all his success!! (There’s room for one more in here!)

Saturday, May 5, 2012
My Hands–a Mother’s Day poem from grown up kids…
I wrote this poem for my mom a couple of years back and added the handprints of my adult siblings so she could hang it on her fridge. She LOVED it! (It’s still hanging there today!) – the poem below the pic is a bit updated and slightly different from the original.

My Hands – By Christy
These hands are not as tiny
As they were so long ago
What once left dirty fingerprints
Has now had time to grow
It didn’t happen all at once
It happened day by day
Watching your hands out to serve
And folded when you pray
Hand that rarely were your own
Always working hard for us
Hands that always kept us safe
Hand we knew that we could trust
Serving, tying, pushing, brushing
Pulling, writing, drawing, mixing
Cooking, washing, changing, flushing
Scrubbing, loving, holding, fixing
These tiny little baby hands
You held before they’d grown
Now hold the little baby hands
Of children of their own
And so I want to thank you
On this, your Mother’s Day
For all you did to help my hands
Love my kids in your same way
Subscribe to:
Posts (Atom)